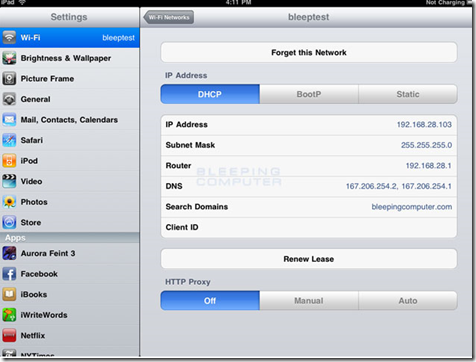
If the wireless network you are connecting to does not use DHCP to assign IP addresses to wireless devices, then you will need to configure your iPad with static IP addresses and other information in order to connect to the Internet or a network. To do this first find out the info, such as the static IP address, IP subnet mask, DNS servers, and router IP address, and proceed with the following steps. Please note, you must first create the wireless profile that you will be assigning static information to.
- Start the iPad
- Tap on the Settings app. When the Settings app loads, you will be at the General Settings category.
- Tap on the Wi-Fi settings category and you will be at a screen as shown below.
You should now tap on the ![]() to access the specific settings of the wireless connection.
to access the specific settings of the wireless connection.
- You will now be at the Wi-Fi network settings screen for the connected network.
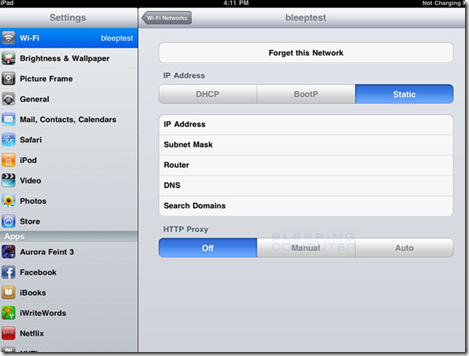
- Now tap the Static button to enter the static settings screen as shown below.
In this screen you can enter the IP address, IP subnet mask, router IP address, DNS server, and search domains as necessary. At a minimum you must enter information in the IP Address, Subnet Mask, Router, and DNS fields for the iPad to be able to properly work on the wireless network. If you do not know this information, you should ask the router owner or administrator.
When you are done entering the information, tap on the Wi-Fi Networks button and then go back to your Home screen to start using the iPad with these new settings.
Source: http://www.bleepingcomputer.com


